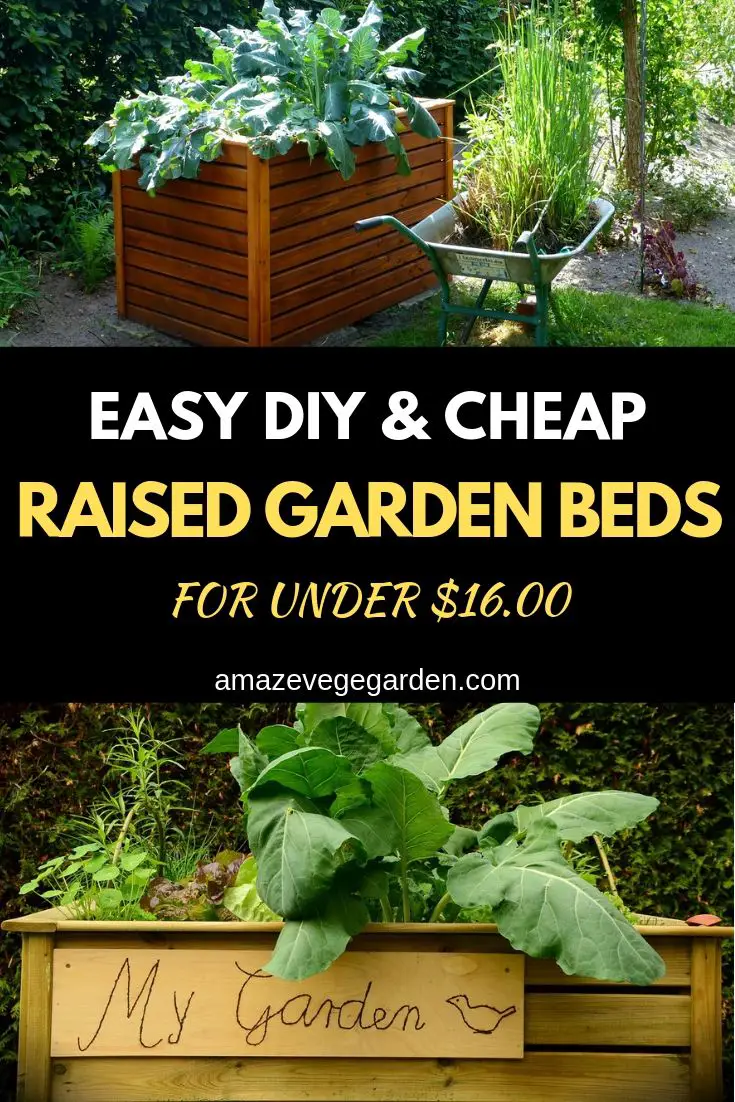
Let’s look at building an easily raised garden bed from the most common material, wood. For this example, the garden bed frame we will use is purchased from our local hardware store.
I have selected this kit because it is simple to construct, easy to replicate, and like many kits, about 20% cheaper than buying the raw materials and assembling them.
Some might argue that we’re cheating by using a kit for our example, but when we examine the kit’s contents, it becomes obvious that making a frame from scratch doesn’t involve much extra effort.
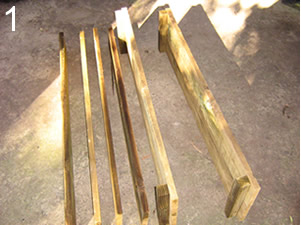
(1) In image one, we can see the components of the kit ready to assemble. Not pictured is the bag of self-tapping screws that hold the whole thing together. The whole kit really consists of eight rough-sawn timber boards, all 6 inches wide and four feet long, four two-inch square blocks, and 16 self-tapping screws. Assembly time will be in the region of about ten minutes.
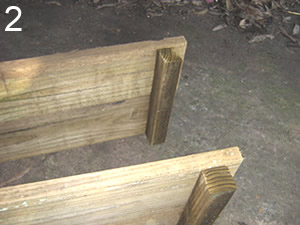
(2) Image two shows a bit more detail about our two-inch square blocks. They have already quite thoughtfully been attached near at either end of two of the boards that have been laid together to form one side of the frame. These two-inch square lengths are not screwed right at the end of the boards but have a one-inch allowance (the thickness of the boards) to allow for a neater fit. We can see in image one that we have two pre-assembled sections like this and four single boards.
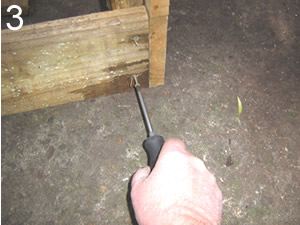
(3) Particularly in the case of a raised garden bed frame kit, I don’t generally trouble myself with squares and the like. I find a nice flat piece of the concrete pad in the shade (the back verandah) and trust it to make my frame fairly level. Stand the pre-assembled sides opposite each other about the distance of the length of the boards apart. Screw one of the single boards to the wooden block on the first corner, as shown in image three, using the concrete pad to keep the board straight. Make sure the join is butted up neatly, and there are no gaps.
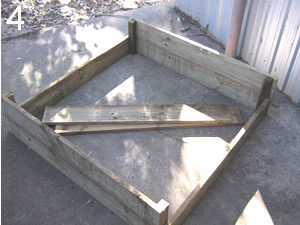
(4) Attach the two lower boards first, one on either side, as shown in image four. All of them are screwed onto the block, as the previous step illustrates. Attaching the bottom of the loose boards first will ensure your frame is level enough not to be noticed by the naked eye.
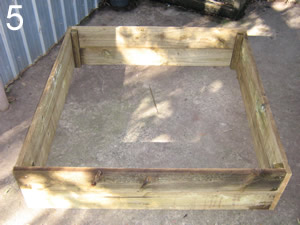
(5) The remaining two upper boards can now be attached to complete the frame, as shown in image five.
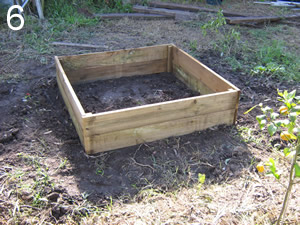
(6) Now, that was really easy. The frame is light and can easily be taken into the yard and placed where we want it, ready to fill with soil, compost, and other goodies, and start gardening!
What materials can I use to build my raised garden bed?
The design and construction of a raised garden bed is in itself a straightforward thing. After all, all we are really building is a retainer for your garden bed. Many vegetable gardeners who use more traditional methods build up their soil into humps or mounds to assist drainage. A raised garden bed takes this further by creating a retaining wall around the garden soil to prevent loss.
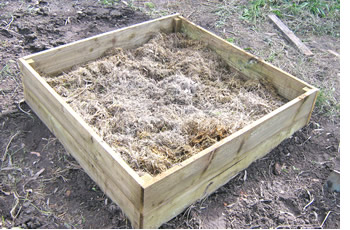
This retaining wall can be constructed from any number of materials, and you can choose to use anything that is freely available, providing it is inert. It will not leach any dangerous substances into your soil that can taint the taste of your crops or make them toxic.
A prime example of this is pine that has been treated with CCA (Chromated Copper Arsenateor), a commonly used toxic chemical that was widely used in the past to treat timber that was then subsequently used for many purposes, including children playground equipment and frames for raised garden beds.
There are concerns that CCA may be leached into the garden soil from the timber and absorbed by your plants. This makes wood that has been subject to this treatment a questionable choice, particularly since a common objective of home vegetable gardeners is to cultivate chemical-free produce.
Wood is the most common material used to create a raised garden bed frame as it is fairly cheap, long-lasting, and strong. It is not necessary to use new timber. Second-hand materials are excellent as long as you bear in mind the previous paragraph about treatments that have the potential to leach into the soil and taint your produce.
If you doubt the safety of a particular source of timber, it may be wise to use something else. One of the most impressive raised garden bed vegetable patches I have seen was constructed using second-hand railway sleepers supported by short wooden stakes at intervals on the outside of the garden bed to stop the sleepers from collapsing outwards under the weight of the soil they contained.
This particular complex of five or so raised garden beds impressed me by the size of the beds and the fact that the frames were laid out during the morning space without a single nail or screw. You drove the stakes into the ground with a hammer. When selecting wood for your frame, try to use hardwood rather than softwood, as it will last longer.
Making Use of Wood or Concrete Blocks
Although wood may be a more traditional choice for building a raised garden bed, I have also seen concrete blocks used with good effect. When placed in a single row, a concrete block need not be cemented and will provide a strong retaining wall. If I were ever required to build a waist-high raised garden bed, which can be very suitable for elderly or infirm gardeners, I would prefer cemented concrete blocks over wood. I feel this would provide a stronger and longer-lasting frame.
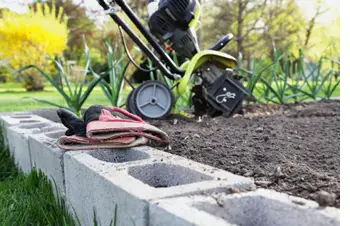
Similarly, bricks can be used instead of concrete blocks, either cemented or laid in place; however, bricks are lighter and can be displaced easily if turning the soil over or adding compost, manures, and such, so joining the bricks together with cement seems to be a better proposition under these circumstances.
When compared to the price of a wooden frame, concrete blocks or bricks are generally a more expensive option, but the wood will eventually rot, and those seeking a very long-term solution may find the “bricks and mortar” to be the better choice. I prefer a wooden frame because I feel it provides a more natural appearance which I find pleasing.
Natural Stone or Rocks
You might also consider using natural stone or rocks to construct your garden bed frame, but cement tends to be necessary to plug the wide gaps caused by the irregular shapes that natural stone or rock comes in. As the saying goes, there are no straight lines in nature, and finding a combination of rocks that fit together perfectly is nearly impossible.
Many hardware and garden shops stock raised garden bed kits that compare to buy the materials and construct the frame from scratch. One such kit that has caught my eye recently uses sheets of curved galvanized iron and is available in either 12 inches or waist height.
The waist-high version is a couple of hundred dollars and is something of an investment. Still, when assembled, even a die-hard fan of wooden frames such as myself had to admit that they were beautiful and would look good in any garden, with a range of choices from bright and gaudy to subtle earth colors.
There are many other choices for material to use for your garden bed frame, some more natural-appearing and some easier to work with than others. Whatever you choose, make sure it is a material that is friendly to the environment, enhances the appearance of your garden and surrounds, and is one that you are comfortable working with.
Get Raised Garden Beds In The Shapes You Want
Why a raised garden bed, you may ask?
Well, from an aesthetic point of view – they look great! They are easy to keep clean and tidy as well. In fact, I can’t help but point my sunny little face up to the sky with pride in my surroundings! My home… my raised bed… is the pinnacle of every happy little plant’s dreams.
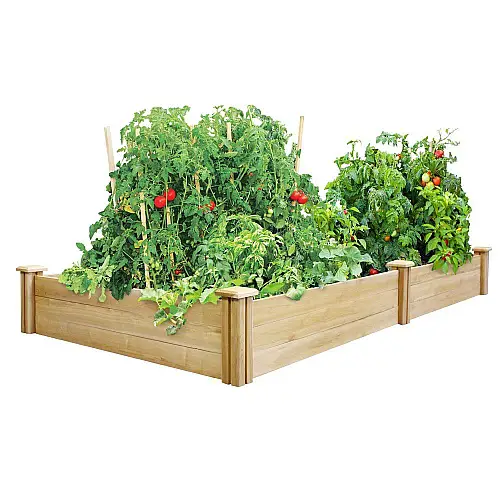
They are also ideal for small spaces.
If you live in an apartment or townhouse with the smallest piece of land available to set up a garden, you should still have the opportunity to have a garden full of smiling sunflower faces or a veritable picnic of veggies growing.
Can Be Setup Anywhere You Want
Raised garden beds can be set up on terraces, in courtyards, and even on verandahs! And if you go to the right manufacturer, you can get small ones or irregularly shaped ones to fit in odd corners or tight spaces. You can also access different heights depending on your personal preference.
The Quintessential No-Dig Garden!
‘No Dig’ sounds good, doesn’t it! Who wants to perform back-breaking work to dig soil when you can grow your vegetables or a happy flower garden in compost (preferably organic to avoid pesticides) by filling a raised garden bed?
It’s a sad truth – not every piece of soil is perfect for growing your desired patch of vegetables or flowers. Even your own garden could have poor soil quality due to the use of pesticides or simply because the ground has been dried out for too long or compacted from vehicles or dwellings.
Sure, you could bring in new soil to build a new garden bed or to top up an old one, but then you run the risk of the new soil being washed away… and little unsuspecting plants with it! It will keep the soil exactly where you want it – and keep all of us little plants in place too!
And raised garden beds help avoid the nasties that some pets and other animals can inflict on your plants.
Take it from this little sunflower – dog wee is not the most pleasant way to shower! And being dug up by a bandicoot doesn’t fall in the fun adventures category! A raised garden bed lifts your vegetable garden and flower patch out of harm’s way.
And, of course, after you’ve planted your plants, remember to add mulch- it’s a sure way of keeping moisture in the soil.
The fact that you’re reading this means there’s a good chance you’re looking for high quality one at a reasonable price, backed by the support of friendly and helpful customer service.
If you’re like me, then you appreciate just how much it can help your gardening. Very little bending makes it easier to pick your flowers or vegetables. And if you’re in an area where space is tight, digging is a real chore, or pets or bandicoots are destroying your best gardening efforts, then raised garden beds are the ideal solution.
You will find there are very few companies that specialize in manufacturing and supplying custom-raised garden beds. Therefore it puts those gardening companies in the unique position of providing something tailor-made to suit your specific requirements and budget.
Indeed if you need a ‘triangular shaped’ raised garden bed to fit in an awkward part of your garden or property, you can get it from the market as well.
Choose The Right Location For Raised Garden Bed
A few factors must be considered when choosing where you will put your raised vegetable garden bed. Most of us will be limited to a small number of vegetable garden beds in a suburban backyard. Some of us will be luckier and have more available space to cultivate.
The size and number of your raised garden beds will determine exactly how productive they will be and how much food you can reasonably expect them to produce.
For complete self-sufficiency, a family of four would be well provided with a vegetable garden of about 50 square meters. A family of six can be provided for out of the same area by planting more main staple crops.
Now 50 square meters is a very substantial vegetable garden, a traditional garden bed 10m X 5m as an example, or five raised garden beds that are 5m x 2m.
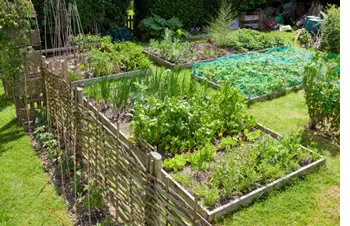
If complete self-sufficiency is your goal, your garden will need to be of these proportions to ensure an adequate year-round supply of food. An area of this size will take up a significant percentage of the average suburban block.
Fortunately, raised garden beds tend to be far more productive than traditional gardens, and with good gardening practices and a little experience, you may find 40 square meters more than adequate.
When selecting the location of your raised vegetable garden bed, you must first examine your available options and keep a realistic expectation of how much food a given area will produce.
Shade Patterns
Although in the past my family has been virtually self-sufficient as far as producing vegetables at home, a change in the shade patterns reduced the available area for vegetable gardening, and I was forced to reduce the size of our garden beds, allowing part of it to return to lawn.
As a result, we no longer grow our own potatoes, which compensated for the reduced garden area. Potatoes are a readily available staple part of the Australian diet and can be purchased quite cheaply compared to other vegetables our garden produces.
If your garden bed is limited in size, it can still present substantial savings in your budget by carefully selecting what you grow and buy, so don’t feel discouraged if your vegetable patch is not fifty square meters.
I mention shade because it is a significant factor in how productive your raised garden bed or any other garden will be. With very few exceptions, most food crops require a warm sunny position with at least six hours of direct sunlight every day.
When selecting the position of your vegetable garden, you must consider how much sunlight your prospective location will receive. In the previous paragraph, I mentioned that changing shade patterns made part of our garden not viable.
This happened when our neighbors to the rear of our suburban 1/4 acre block decided to knock down their house and build a duplex. You built one of the flats exactly at the minimum legal distance from our rear fence, adjacent to the north of our vegetable patch.
This meant that a section of the previously good garden was in the permanent shade for about five months of the year and received limited direct sunlight for the majority of the rest of the time.
The impact of this was immediately noticeable and served to illustrate how important it is to familiarize yourself with the shade patterns of your prospective garden bed throughout the year.
Bear in mind that as the seasons change, the sun moves in the sky. In the southern hemisphere, just above Sydney, the sun is virtually overhead in summer and fairly low in the northern sky in winter.
Those in the northern hemisphere will, of course, see the sun go south in winter. Failure to take this into account may result in a garden bed that you can only cultivate during certain times of the year.
Try and site your garden beds at right angles to the axis of the sun and run your crop rows to the north and south (regardless of what hemisphere you are in) and you will find you will minimize that shading from your crops themselves. The soil will be warmer, particularly during the colder months.
Problem With Your Drainage?
Drainage is less of an issue with raised garden beds but still requires some consideration. Making the beds higher is an easy solution. Still, you will find that if your native soil is heavy clay or of a similar poorly draining composition that you might experience surface water runoff during periods of heavy rain.
In extreme cases, you may need to build your raised garden on a gravel bed and use agricultural pipes to transport the excess water away from the site. Consult your council or local government to ensure that the water is dealt with according to local regulations.
Perhaps one of the situations where raised garden beds may be the only option is on severely sloping ground. A traditional garden bed may be eroded or completely washed away in heavy rain on a steep slope. The Incans and many other cultures used raised garden beds in terraces to better combat soil erosion.
In the picture above on this page, we can see where the raised garden beds have been incorporated into the overall landscape design with huge success, permitting steep ground to be reclaimed and put to good practical use while enhancing the appearance of the garden surroundings.
Soil For Your Raised Garden Bed
The soil that you find in your local area may be quite suitable to use as a base for improvement, but very few of us are fortunate enough to live in a place where it is suitable for the sustained growth of nutrient-hungry vegetables.
Whether you decide to improve your local soil or import new soil is an individual decision that you should make carefully. It will have a great influence on the productivity of your raised garden bed, particularly when you first start.
Soil Types
Soil or dirt is composed of particles of broken rock that have been altered by chemical and environmental influences such as weathering and erosion.
The soil is grouped into different types according to particle size and falls into three groups: sand, silt, or clay. Sand, silt, and clay can be combined (either naturally or by design) to make a loam.
Different sized soil particles have different properties that, when combined, can provide specific characteristics that will make them suitable for a given purpose, such as a vegetable garden.
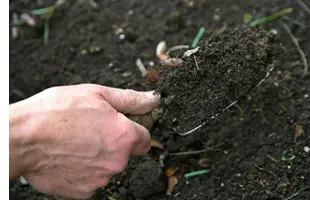
Sand particles vary in size from 0.0625mm to 2mm in diameter and feel gritty when rubbed between the fingers. Sand has excellent drainage and aeration characteristics but does not retain plant nutrients well and by itself will only support growth from plants adapted to a dry low nutrient environment. When added to denser soils, it makes an immediate and permanent improvement to the drainage character.
Silt particles are smaller at 0.0039mm to 0.0625mm in diameter and feel like flour when rubbed between the fingers. Silt is generally transported and then set down by the water and, as a result, has a very even fine structure that is usually very rich in minerals leached from soils at higher levels. Indeed, silt deposited by the annual floods of the Nile River created the rich fertile soil that sustained the Ancient Egyptians.
Clay has the finest particle size by far at 0.0039mm or less. The small particle size of clay allows it to become waterlogged very easily, making it difficult to work with. The clay becomes heavy and very plastic when dry most clays set harder than stone, making them equally difficult to work. When creating your own garden soil, it is considered the hardest soil to start with clays’ high mineral content.
Loam
Loam is soil composed of a mixture of sand, silt, and clay. There also should be a reasonably high content of organic matter or hummus as it is sometimes called.
For good general-purpose vegetable garden soil, a loam comprised of 40% sand, 40% silt, and 20% clay will provide a base that will be gritty, moist, and retain water and nutrients well without becoming waterlogged and unmanageable. You can then build up this mixture by adding organic matter such as compost.
An advantage of raised garden beds is that dependence on the native soils is greatly reduced. You can fill your frame with any soil you wish and rely on it to prevent it from spreading to and mixing with the less desirable soil.
Purchasing a soil mix from your local nursery or landscape supplier can be a shortcut to a quick, productive vegetable garden. Alternately you may prefer to improve your local soil; however, be aware sometimes this can be a slow process.
Examine your local soil and determine its type. Is it sand, silt, or clay? If sand, adding silt and vegetable matter in suitable quantities will provide a fairly quick fix. If it is silt, you may find that it does not drain well, which can be easily remedied by adding sand.
Clay can be more challenging. This is the type of soil found in my local area, and improving the natural soil has proven to be challenging. Adding gypsum slowly loosens the clay up and allows it to separate into loose particles. It can improve drainage by adding river sand.
Regardless of the type of soil you use in your raised vegetable garden bed, the nutrients contained in the soil will become depleted over a relatively short period of time, and it is common for most gardeners to add additional organic material such as compost and manure every year or so at a minimum. Improving your soil and maintaining it is an ongoing task that you can really complete.
Improve your Raised Garden Bed Soil With Compost
Composting at home, school and work has become quite the trend as our world moves to a greener and more environmentally friendly outlook. In many places, the available land for waste disposal is slowly being filled up.
Some experts speculate that up to half of all household waste is organic and can be recycled using many composting techniques. Composting can conserve landfill space and reduce greenhouse gases through a faster and cleaner composting process regardless of what you do with the compost.
The most environmentally friendly method of composting, in my opinion, is vermicomposting, which utilizes earthworms to break organic material down into worm manure which can then be used as a nutrient-rich organic fertilizer.
Wide Usage
Compost is rich in nutrients and can be used in gardens, landscaping, horticulture, and agriculture. Using compost adds vital humus to the soil of your garden bed, providing the nutrients that your vegetables need to grow and acting as a natural pesticide.
There are many different methods for making compost; however, they all work on the same basic principles, and their results are largely much the same.
Proponents of a particular method may claim that their approach to composting may be faster or produce better quality compost. I feel that most methods are quite satisfactory, and few have any advantage over others.
Most methods agree with good science. There needs to be a certain amount of well-aerated organic composting material present for the compost pile to heat up sufficiently and compost quickly.
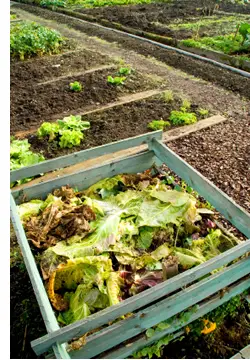
This is often referred to as a critical mass, and in the case of your compost pile, it is an area of approximately one cubic meter (1m X 1m X 1m).
Keep this critical mass in mind when you select a ready-made compost bin from your garden supply shop, or you start drawing plans to make a compost bin. If your compost bin is not in the area of a cubic meter, it doesn’t mean that your organic material won’t compost at all. It will simply break down at a slower rate.
You don’t even really need a bin for composting. You may prefer to make a big pile of organic material; however, bins, bays, or containers really do make the process more even and much neater. A good compost bin size is 1.5m x 1.5m and about 1m high.
Ideally, three bins this size would provide a great deal of compost for ongoing use, one bay to fill up with day-to-day organic waste and two other bays that have been filled and are composting.
Make From Organic Materials
The compost is made by stacking organic materials such as garden waste, vegetable peelings, fruit peelings, coffee grounds, tea leaves, finely shredded paper (not glossy!), lawn clippings, etc. and the like. I personally favor alternating layers rather than a simple pile.
First, a thin layer of soil, perhaps 2-4cm thick, then 15cm of organic material, then a 2cm layer of manure (cow, chicken, or horse), a dusting of lime, and then another 2cm layer of soil. The compost pile should be kept moist but not waterlogged, and if it is composting well, it will be hot, particularly in the center.
Some debate exists over whether or not you should turn a compost pile to facilitate aeration. I tend to assess each pile as an individual. If the composting process slows and the pile has adequate moisture turning the pile over with a fork can get the pile cooking again.
Some gardeners feel that turning the compost pile once a week is mandatory for a good quick compost as air is an absolute necessity to the process.
When your compost is completely broken down, it will have a rich sweet smell that looks and feels much like dirt. You can dig completely broken-down compost into a garden bed that is ready for planting.
Partially broken down compost can be dug into a garden bed or used as mulch only if the bed lies fallow for a few weeks before being planted.

